☰ Table of Contents
- Complete Guide
- Table of Contents
- Introduction
- Welcome to iScreensaver
- Downloading and Installing
- Designing and Preparing
- Preferences
- Managing Projects
- Importing Media
- Editing a Screensaver
- Branding Control Panels
- Customizing Installers
- Building Installers
- Distributing Installers
- QuickStart and Sample Projects
- Installing a Screensaver
- Troubleshoot
Downloading Sample Files
DOWNLOAD a 190MB complete set of imagery and a sample .ISC project with which to practice.
Windows users should 'Save' the zipped folder, then 'Extract All' to use the files.
When first opening the project, the SpaceDemo.isc file should point to everything local in the same folder, and everything should be automatically relinked. Saving the project will remember that location.
Space
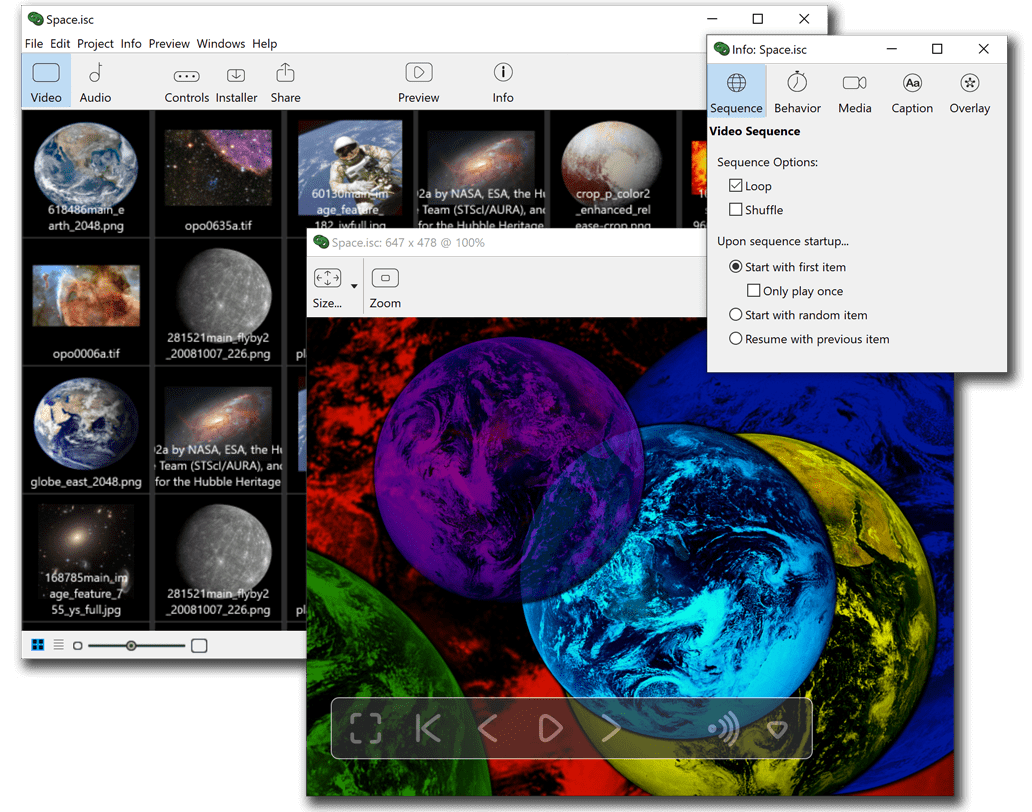
The Space screensaver has examples of many of the advanced features possible in iScreensaver. High resolution effects with custom 3D motions, and the use of sequences including images, h.264 movies, and 3d (.GLB, using GLTF 2.0 binaries) objects.
Obtaining or creating your assets
Make your own photos, video, art, music, 3d animations, and Live Photos.
Archive.org, NASA.gov, and the BBC, for example, have various images and video clips available under various licenses. Copyright law is complex and differs from country to country, so be sure you have the rights you need to use any media assets. For many reasons, using your own work is often the best idea.
For Space, we use sources at nasa.gov for images and videos in the public domain or with accredited usage, according to their terms of use. We do not claim copyright on the images, claim any sponsorship by NASA, nor otherwise explicitly or implicitly convey their endorsement or sponsorship. However, their hard work in obtaining these images from space is greatly appreciated.
DOWNLOAD a 190MB complete set of imagery and a sample .ISC project with which to practice.
Windows users should 'Save' the zipped folder, then 'Extract All' to use the files.
When first opening the project, the SpaceDemo.isc file should point to everything local in the same folder, and everything should be automatically relinked. Saving the project will remember that location.
This SpaceDemo download is a duplicate of our Space screensaver demo, available from our Downloads page. Examining some of our more complex motion effects will better assist with your own screensaver projects. If you download directly within iScreensaver Designer, then SpaceDemo.isc should automatically open.
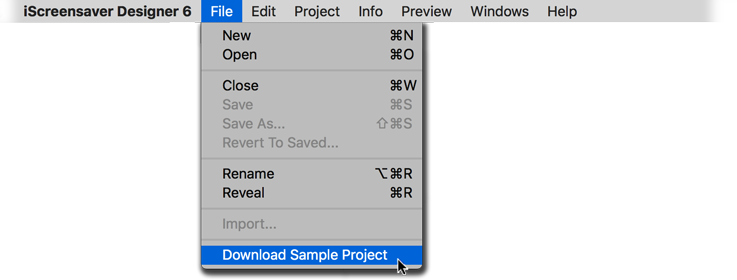
Download SpaceDemo.zip directly from within iScreensaver Designer.
Preparing your assets
A third-party application like GIMP or Adobe Photoshop can be invaluable in adjusting, cropping, or formatting your images. We have some artwork tips for creating images with transparent masks.
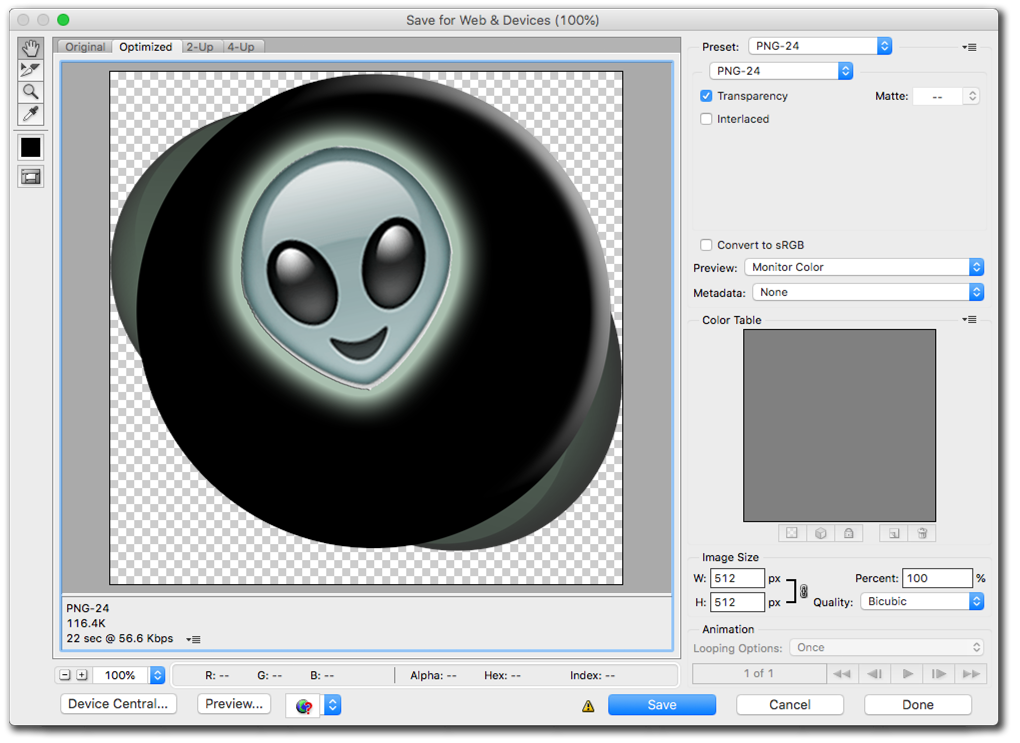
Adobe Photoshop's Save for Web feature can prepare icons and overlays.
For creating Space from scratch, some images might need touching-up in Adobe Photoshop. Planets and some incomplete spheres need alpha masks. The icon needs sizing at 512x512 pixels, with an alpha mask too.
Organizing assets on disk / Setting up your folders
By placing all included assets together in one folder, it becomes simpler to package together one project for archiving, once complete. Subfolders, such as for audio, overlay art, or video, also help separate the elements for future project revivals. Certainly, your folders can be named differently, or you can go without and import files from any local storage location.
Place all project assets together in a simple folder structure.
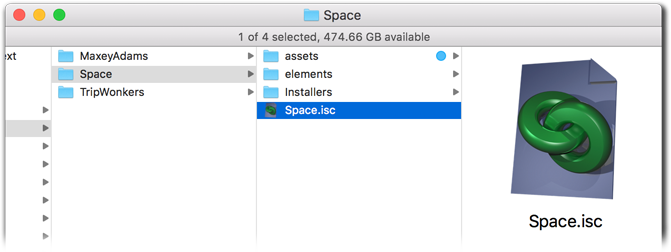
For SpaceDemo, we created inside the 'iScreensaver Projects' folder: a single folder called 'SpaceDemo', which holds the SpaceDemo.isc project file, a GenericIcon.png file, and all the 'assets' of all the images and movies. Eventually when we build the installers, the 'Installers' folder will appear inside the 'SpaceDemo' folder.
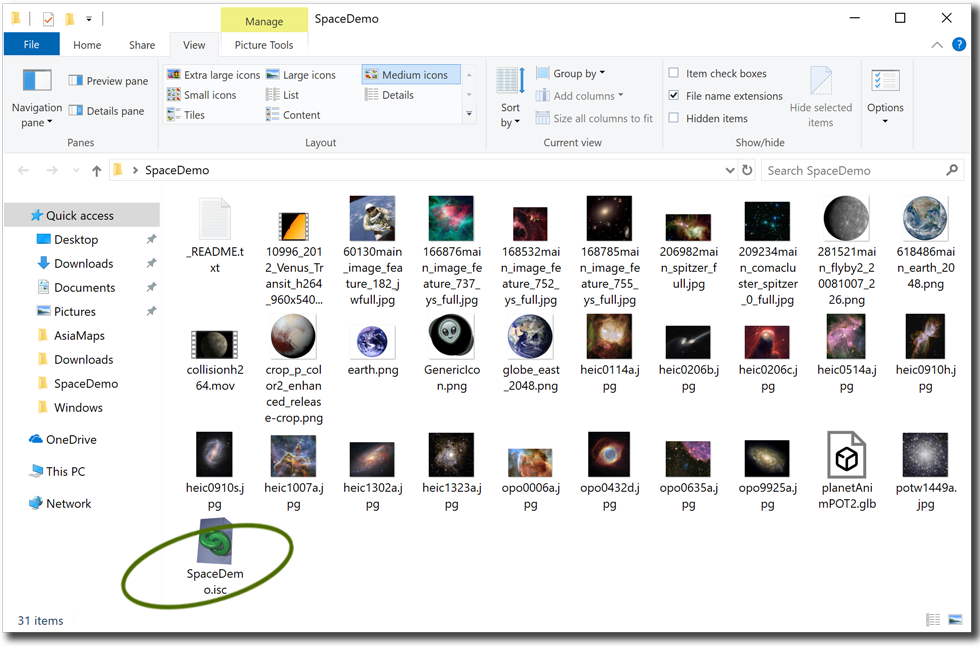
The SpaceDemo folder structure contains every asset along with the Project file.
Working between multiple projects
For this tutorial, let's make a fresh project called Space.isc upon which to work. You may open both Space.isc and SpaceDemo.isc at the same time. Assets can be copied between them by drag-and-dropping between project windows, or by copy and pasting files with standard commands.
Creating a new project
Open iScreensaver. The Projects list window will open.
For Space, we create a new project, and use the wizard to name it 'Space', which places the name 'Space' throughout the project. We may want to change that later in places.
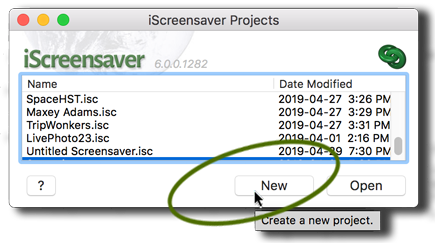
Open iScreensaver to the Projects List. Select New.
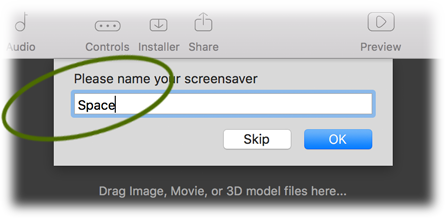
Use the Wizard to auto-name the project, other filenames, and dialog titles.
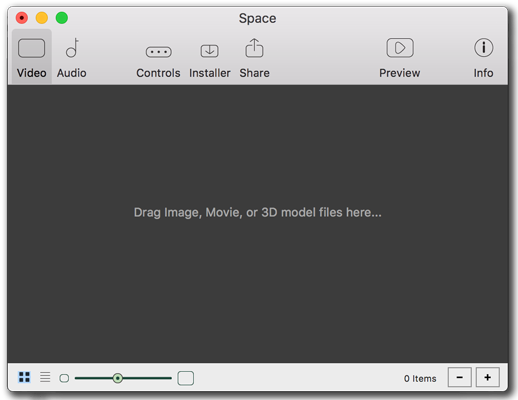
The project filename has been set, but has not been saved.
Importing your video assets
The easiest way to import is to drag and drop files or folders from the desktop. If you drag and drop from existing projects, most all individual settings for the media items should be transferred as well.
For Space, we drag-and-drop the 'assets' folder into iScreensaver's video sequence area of the new project.
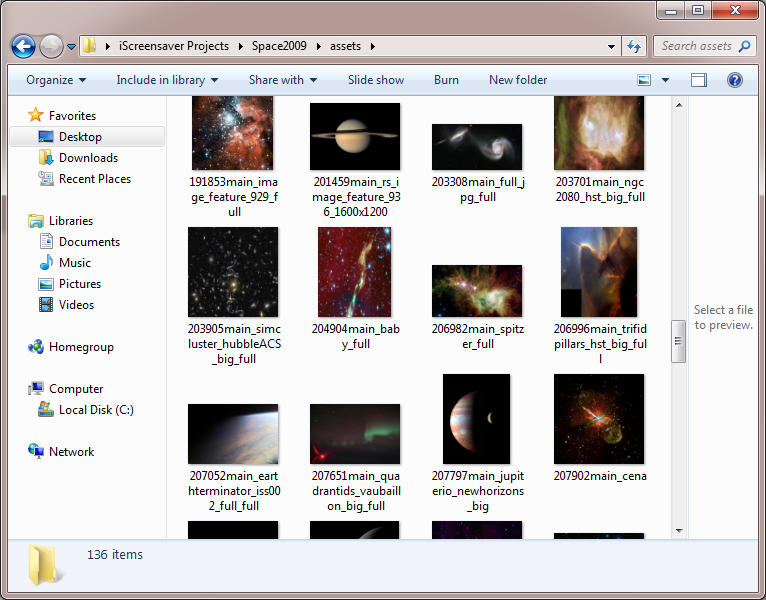
Images collected and stored inside the assets folder.
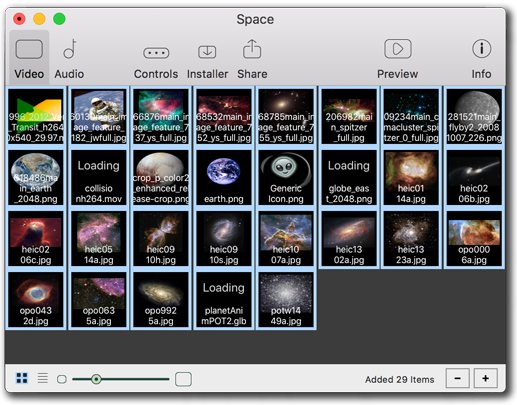
Drag and drop the assets folder to the sequence area.
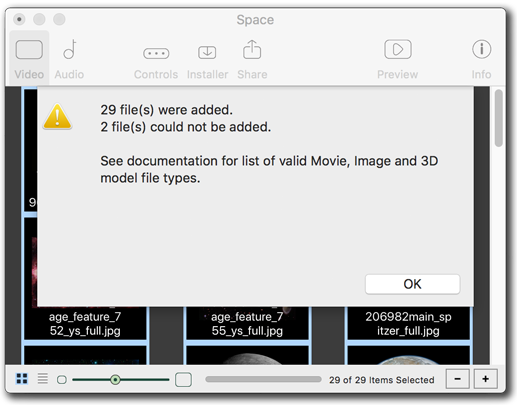
Receive an Import Report where sometimes folders contain non-asset files.
Importing your audio assets
Not all screensavers need to have audio. Screensavers with audio sometimes find themselves quickly uninstalled. However we know audio has its benefits. The easiest way to import is to drag and drop files or folders from the desktop, but we've included an easy Add File button.
For Space, we went silent - no audio.
But if we were using audio, here's another way to import the files. Note that the Windows file browser only allows selection of single items, but Macintosh allows multiple at a time.

Click the + button to add a file to the sequence.
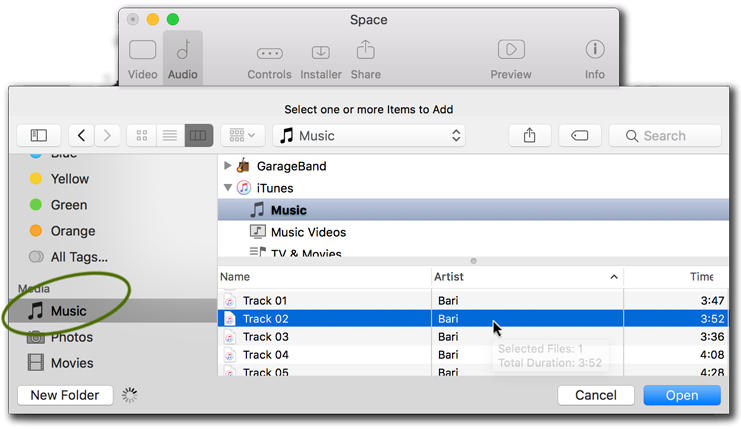
Select your music files.
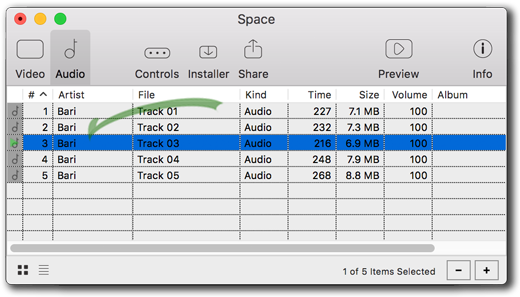
The audio files appear in the list.
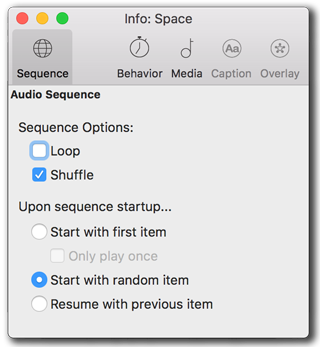
If you have more than one audio file, try using shuffle.
Arranging sequence patterns
Items can be then moved around in the sequence area to adjust the order in which they are played, however in the case of shuffle, order doesn't matter.
For Space, we placed everything in a very particular linear order. For your Space, you can match our order, or use 'Shuffle' so your sequence order does not matter, except for the first item, which we happen to always want playing first when the screensaver starts. As example, we move our Earth image to the Item #1 position, and set our Video Sequence settings.
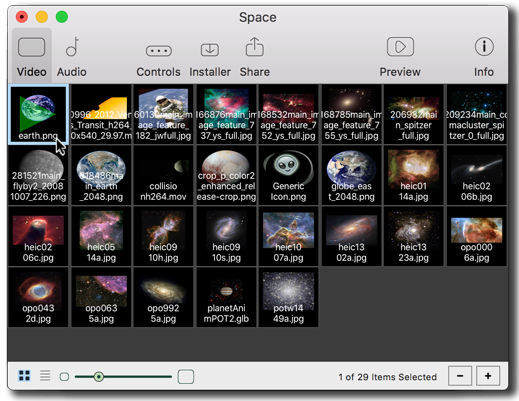
Move 'earth.png' to the starting position.
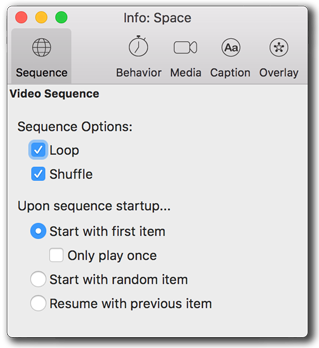
Start with first item, then shuffle upon every looped sequence.
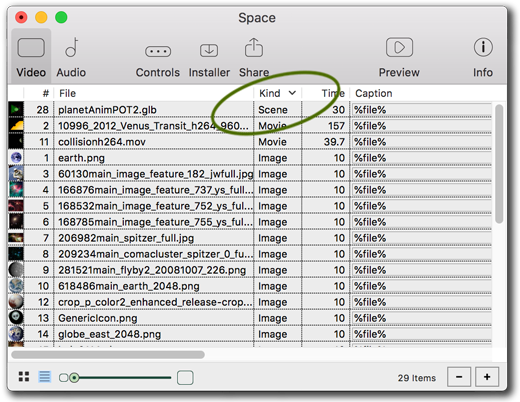
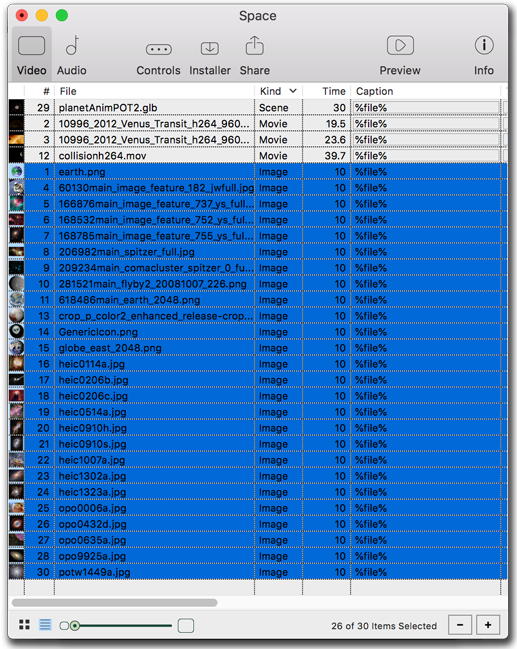
Set the Video sequence to List View, then click the column title to sort by Kind.

Overlays default to Off.
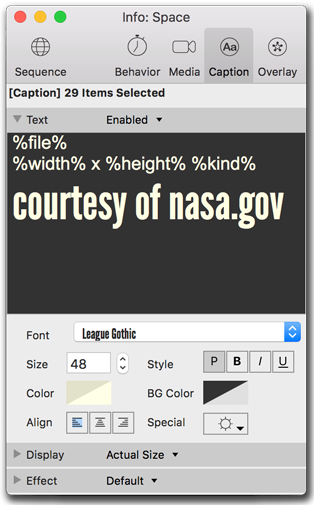
If enabled, edit all the common caption information at the same time.
Setting grouped settings
It's easiest to edit all the 'common' settings at the same time, whether it be caption text, durations, or master control over overlays. Selecting multiple items allows you to change a lot of settings at once. Remember that List View can let you re-sort and select items quickly.
For Space, we use one longer movie twice with two differing in- and out-points to show two secitons of the movie's animations, plus we wish all images to last about 15 seconds, neither which are default settings. By re-sorting in List View, we can choose a single file-format to affect. Later, some items will be set different as we adjust them on an individual basis.
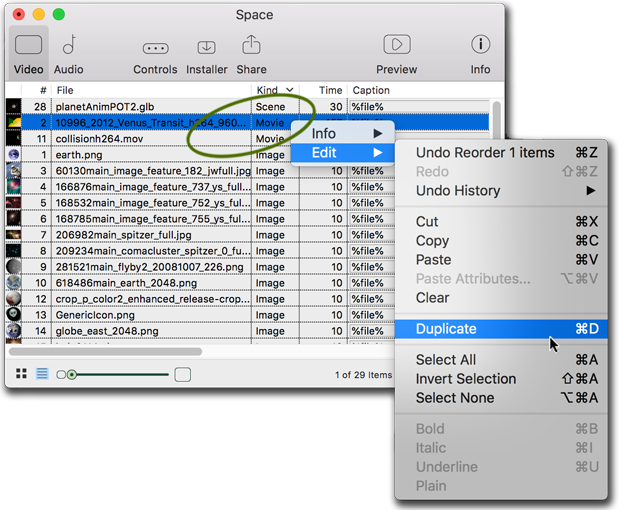
Duplicating an asset takes no extra space within the final built screensaver.
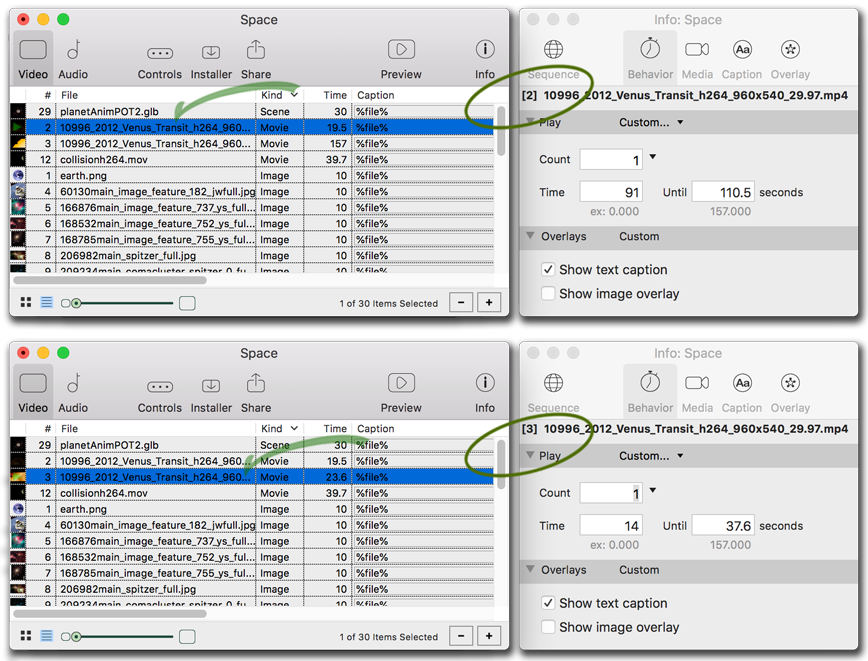
Set different edit points to different instances of the same movie.
Enter the out point first to set the range.
Use shift-click to select from a starting item to a ending item.
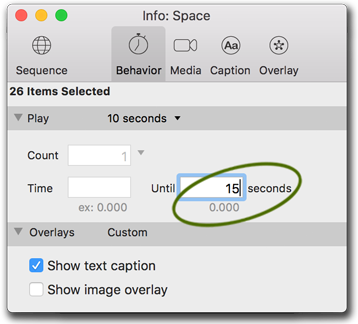
Either choose from the preset, or type '15' for the new duration.
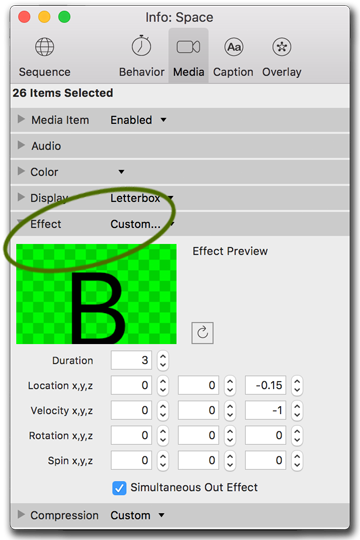
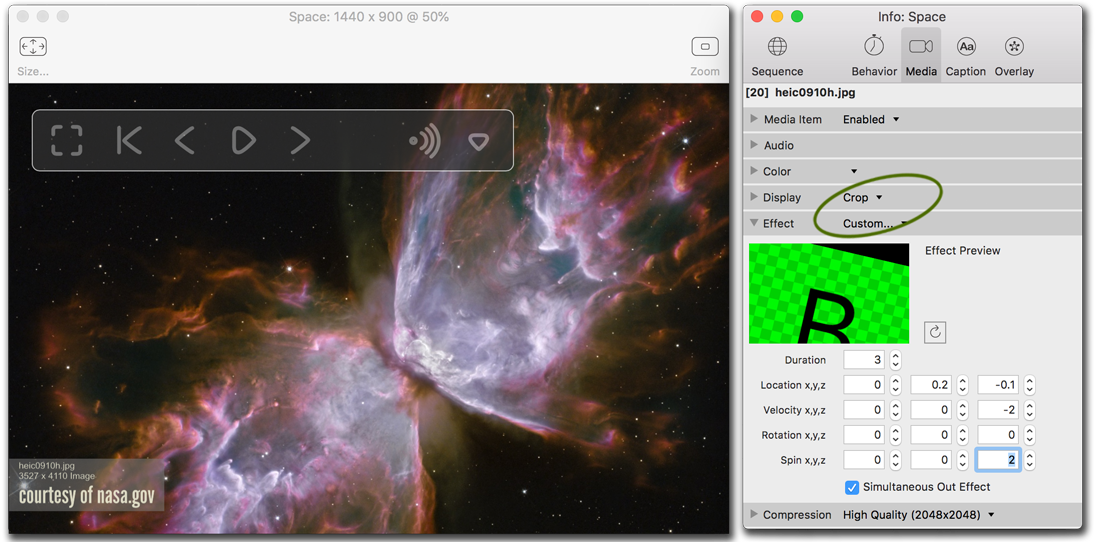
Choose 'Custom...' from the preset. These parameters move images slowly towards the viewer, as if the camera was zooming in or falling into the stars.
Setting individual settings
Select each item individually to edit just its settings. The Preview window can help guide as you move through the sequence list one item at a time, as some individual images may need different settings for Display or Effects. If you find settings you'd like to transfer to other assets, the different attributes can be pasted separately. Hint: duplicating and re-using items in a sequence does not multiply the size of the final screensaver, so it's possible to have several motion effects for a single, but duplicated, asset.
For Space, many imported images will default to JPG compression, while any images with alpha masks such as PNG, TIF, or Pict will be imported with Color Mask and Compression settings automatically set. Switch to Captions tab as needed to edit individual credits, or edit directly in List View (though items with various font styles may have their text normalized).
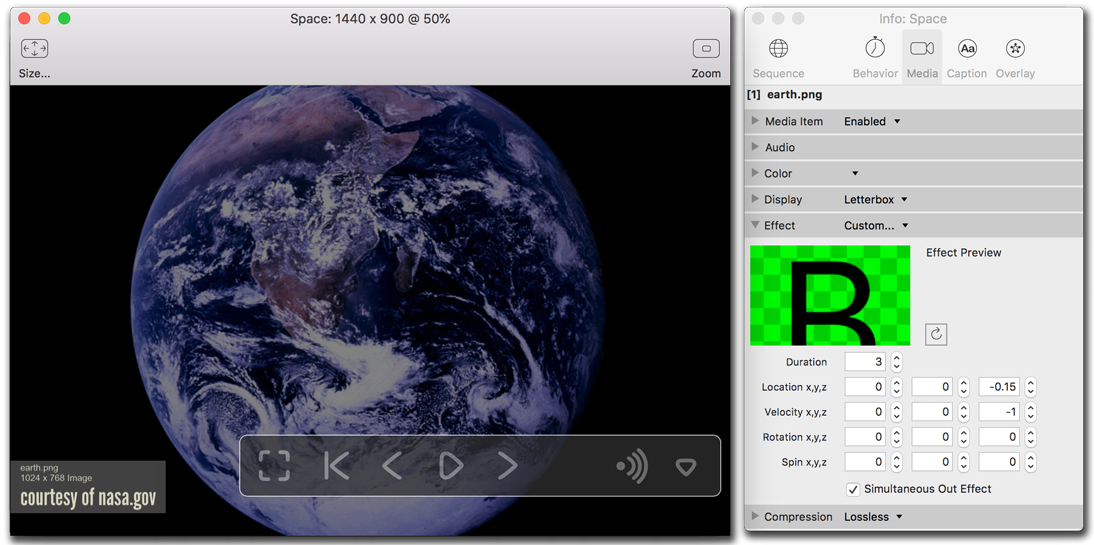
Open the preview window to see individual effect changes.
Some images look better cropped to fit the screen...
Some images look better letterboxed to fit within the screen.
Different effect parameters slowly spin towards the viewer.

Images with alpha masks import with automatic Color masking and Compression settings.
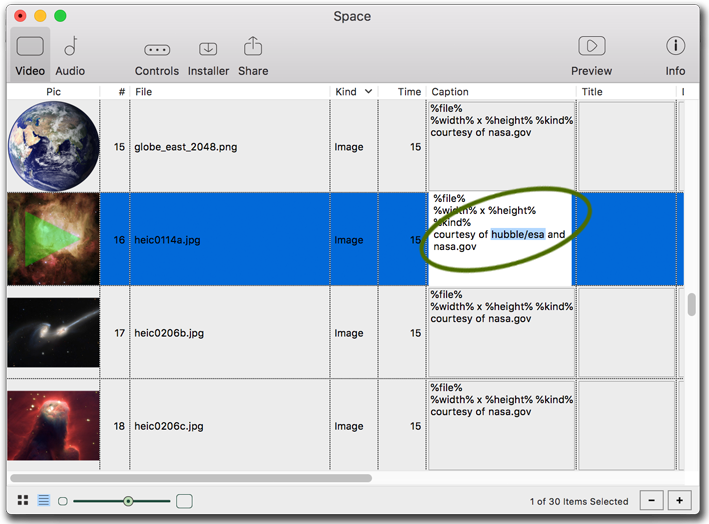
List View has another way to edit caption text.
Customizing controls and installers
The Controls and Installer tabs allow you to educate your end users more about your screensaver during both installation and use. The titles were set with the wizard when starting the projects, but can be changed if desired. If splash picture art is used, it will be sized to 784x240 pixels to fit. Weblinks can be set to return users to your website.
For Space, we altered the texts to make it clear that we are not affliated nor endorsed by NASA, nor claiming copyright over any assets used in the screensavers. Our splash pictures we left as their defaults.
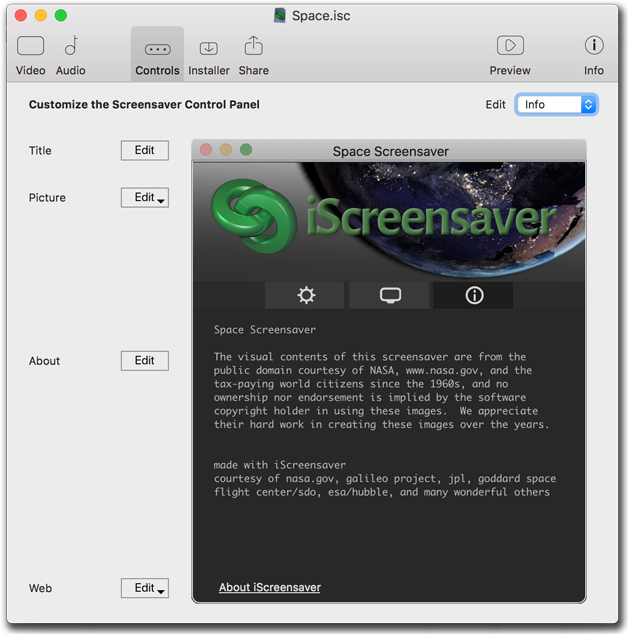
Set the Control Panel art and texts.
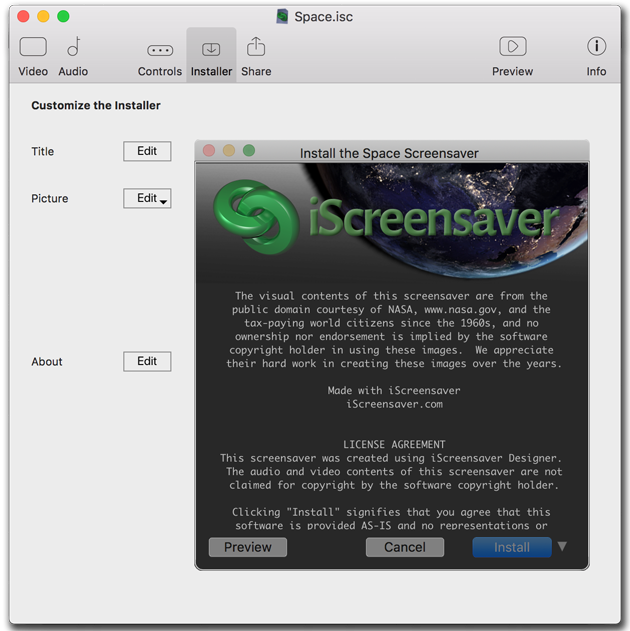
Set the Installer art and texts, which can include any End User License Agreements.
Building installers
The wizard has taken care of the filenames on the individual platforms, so that you can build all platforms at the same time from the Share tab. Or, add icon art, screensaver thumbnail, or desktop wallpaper.
The Build Progress apprises of build warnings, errors, and other pertinent information, and allows installation when complete. Reveal shows the installer folders and zip files for both platforms, and please use the zips to transfer to clients or end users via the web, email, or onto discs.
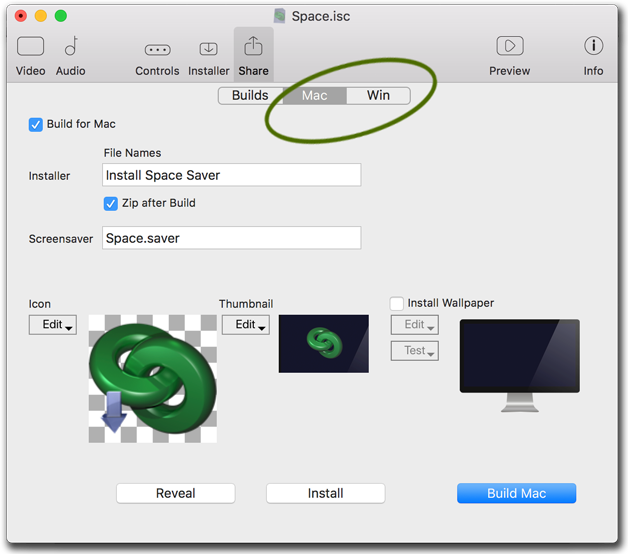
Macintosh build options.

Windows build options. Note that once built, you can install directly from this tab.
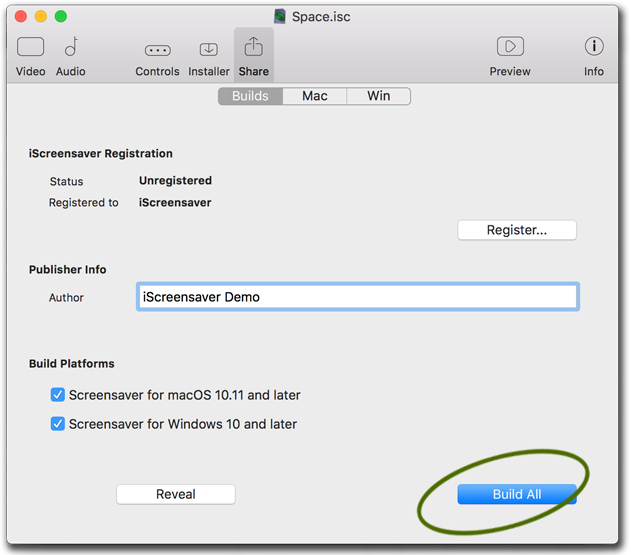
Proceed directly to Build All.
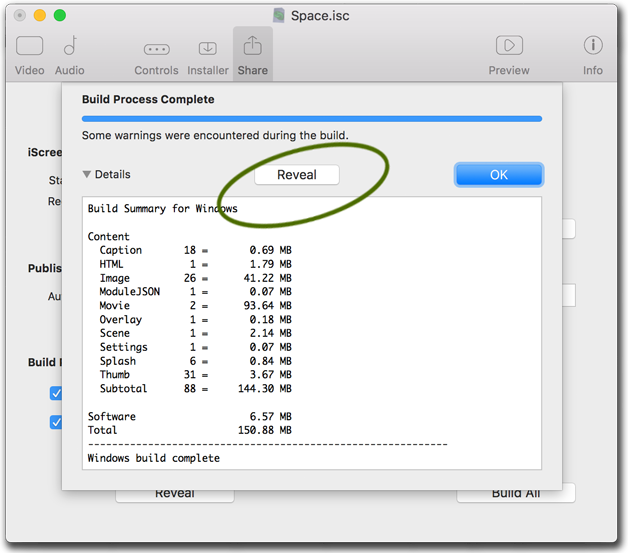
Build Progress gives a wealth of information.
Test or reveal the installer directly from here.
Testing screensavers
It's really good to test your final installers, and to test on as many different machines as possible, mostly to gauge how your project responds to different hardware and monitors. What may work fast on one machine, may display differently on another.
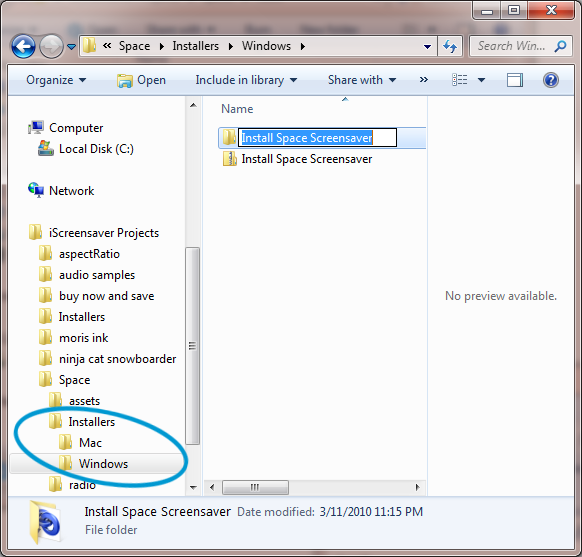
Click Reveal in the Build tab to show the actual location on your local storage.
Installing a screensaver
If your installer gives a warning about unknown developers, this is common when a screensaver is not a commercial product. Platform OS security has tightened concerning application installations, but if you trust the software source, it is relatively easy to bypass these warnings, view how to bypass unsigned warnings.Once launched the screensaver installer will look similiar to our Space project.
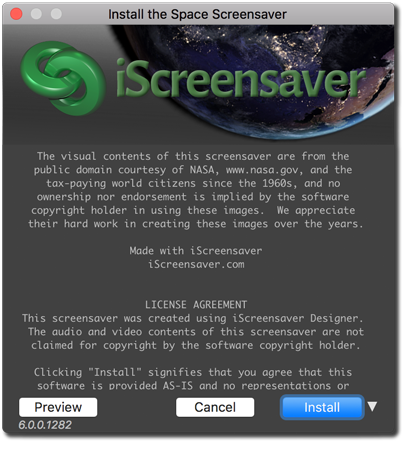
The Installer.
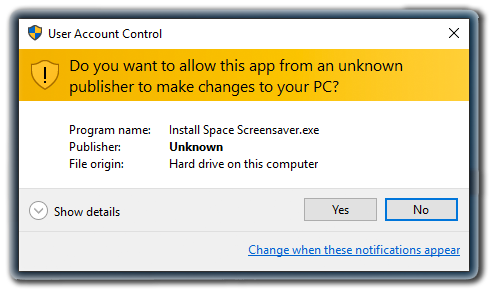
Order an official publishing certificate to remove these messages.
This is a highly technical process with other third-party software.
Using your screensaver
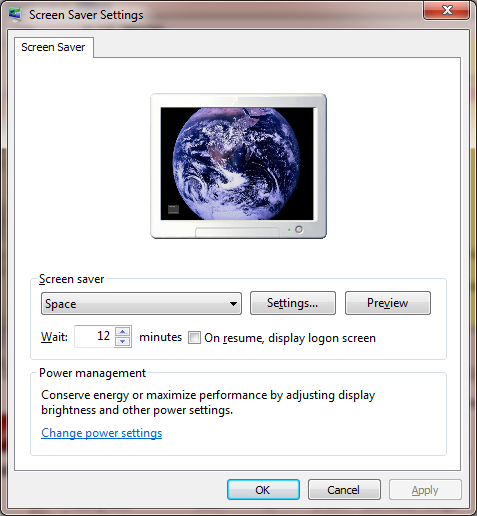
Windows' Screen Saver Settings.
Click 'Preview' to test the screensaver or 'Settings...' to change screensaver options.
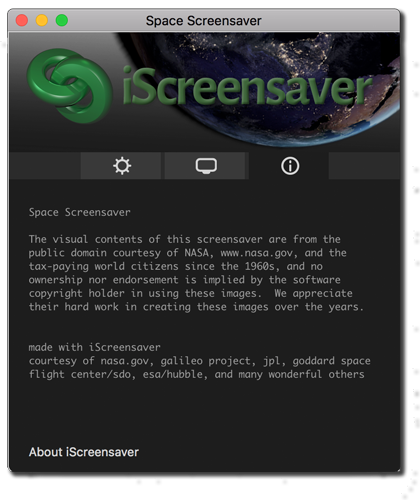
iScreensaver control panel: Info Tab
This information is customized by the screensaver author.
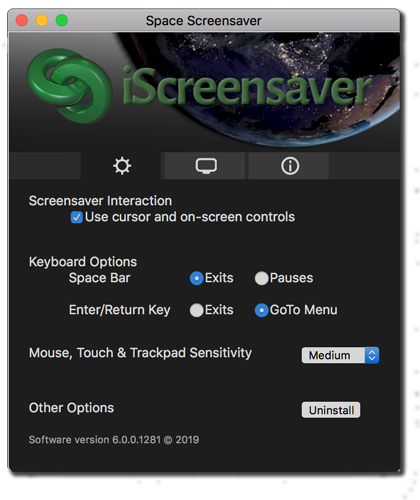
iScreensaver control panel: Options Tab
These settings can be set by the user to control mouse, trackpad, and keyboard behavior.
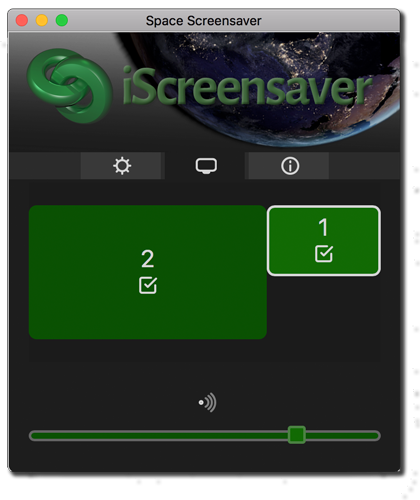
iScreensaver control panel: Screen and Volume controls
The user can choose which screen(s) to run the screensaver on, as well as adjusting per-screen volume (if the screensaver includes audio).
Uninstalling your screensaver
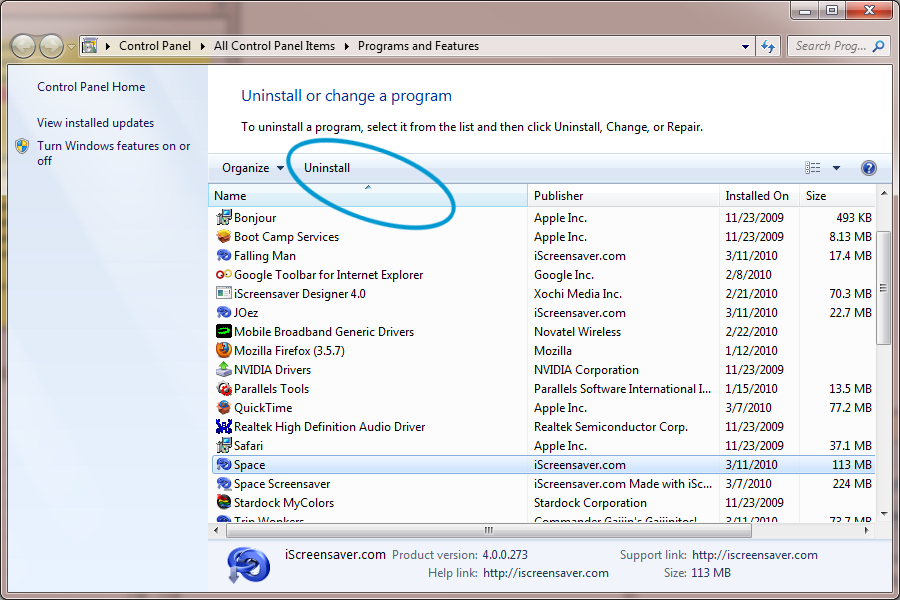
Clicking 'Uninstall...' opens Windows' Programs and Features.
Select the screensaver and click Uninstall.
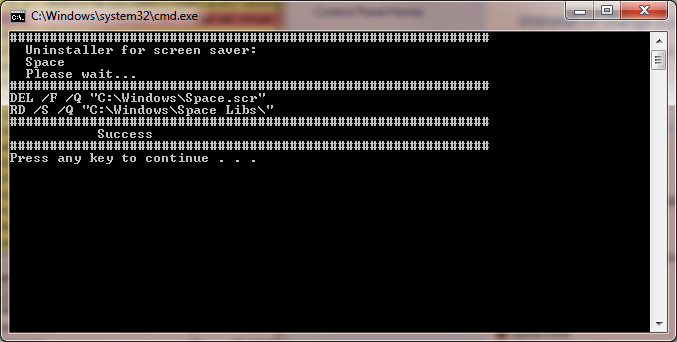
The return of MS-DOS, in uninstaller form.
Success!
Of course, now you are going to want to go through the entire User Manual, which explains many more important details and gives plenty of questionable advice.